Podcasting
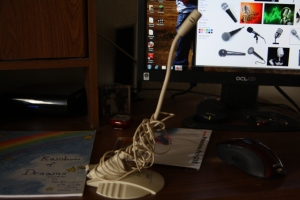
 One of the fun activities our students loved being a part of this year was podcasting. We decided, as a summative assessment, students would choose an artifact during any time in history and present how that artifact was used to change history and how that artifact changed their personal lives. Before we got any further in the lesson it was so important for the students to understand what a podcast sounds like. So we played for them a number of free podcasts from itunes. Some of our favorites were from HowStuffWorks and What you Missed in History Class. These helped the students understand what their scripts may need to look like and the noises or music they could use to help create their podcasts.
These “podcasts” were not published on the internet -although there are numerous websites that will allow for you to do that – but they were placed on our school’s network folder so that every grade had the opportunity to listen to some of them.
What do you need to do this?
Audacity is free audio editing software. It is open-source – and I have found that this program is great for mixing music or sounds with the audio recorded from the students.
The only odd thing about Audacity – the reason why it’s free – is you need to download an extra file called a lame encoder – in order to create mp3s instead of .wavs. This is really easy – it’s just an extra step. So after you download audacity click on this link to see how to download the lame encoder – then you can export mp3s.
Telling a story
 There are so many creative ways for teachers to have students tell stories. Story-telling has always been important because it demonstrates sequencing, allows students to transition from event to event, gives opportunity for creativity, and it can be all about the student (promotes interest). There are a number of excellent resources for teachers to use to aid their students in telling their stories. Four years ago I created a green screen with my 5th grade class and cooperating teacher. We got a large wooden board from Home Depot and bright green OOPS paint. We had the class help paint the board – so that it could act as our green screen. We then set up the green screen in our classroom. The students each wrote a story from their personal lives. They then practiced presenting that story to their peers. Last, we set up a video camera and students read their stories in front of the camera. Pictures were brought in from home and we inserted a slideshow behind the students while they were presenting their story. Eventually DVD’s were made for each student. Students were engaged throughout the process and had to go through much practice and many drafts before they had a final product. One of the resources we used when planning for this project was the following website: Website.
Another product that I was introduced to recently is called: Voicethread
- It is free
- It allows for students to tell a story and have peers comment while the story is being told.
- Makes it easy to emphasize parts of pictures or video clips.
One idea of how I have used voicethread is: I had students create comic strips of their journey to the center of the earth. The students had a vocabulary box full of words they had to use in their comic strip. After students illustrated their comic strip they scanned it into voicethread and created their own commentary on their comic strip. Other students commented on their comic strip as well.
Here is an example of a voicethread that I created. My students did not comment on this one, but I was able to give a running commentary while the pictures were moving.
If you want to watch a different tutorial – watch this one: tutorial
Gimpy
The last two years I have taught a media club for my students after school. I always start with Gimp. Gimp has so many incredible capabilities. Funny enough – I grew up using Gimp – so when I wanted to start this media club I knew immediately that this was the software I needed. GIMP is open-sourced – which means it is free and everyone in the world can use it.
There are a number of things you can do on GIMP:
- Edit pictures
- Create pictures
- Design signs or word art
- Personal Favorite: Create animations – because GIMP has layers – I have found this to capture student interest.
You can access GIMP by clicking here.
Unfortunately GIMP is not web-based – which means that you would have to talk to your district about getting it installed on the computers. It’s not large software though – and it is open-source. This is great because students can practice the skills they learn at home.


